Read time: 7 minutes
Picture this: a reduction of up to 50% in your home’s demand for precious drinking water, all achieved while championing environmental conservation. Rainwater, often underestimated, holds the key. In this installation guide, we unveil the simplicity and effectiveness of Graf UK’s rainwater harvesting systems, designed with you in mind. With intelligent components and a modular system for effortless integration, you can now unlock the untapped power of free rainwater.
Where to Place Your Underground Tank: The Art of Strategic Positioning
When it comes to rainwater harvesting, one of the crucial decisions you’ll need to make is where to place your tank. The location you choose can significantly impact the efficiency and aesthetics of your system.
For an ideal setup, position your rainwater harvesting tank at a distance of 2–10 meters from your home. This placement strikes a balance, ensuring it’s close enough to minimise piping and installation complexities, yet sufficiently distant to avoid interfering with your daily activities.
When considering rainwater harvesting, you might wonder if you can utilise the space under your patio or driveway. The answer is yes, and Graf UK offers smart solutions for this purpose, ensuring both convenience and safety. This innovative approach lets you make the most of available space without sacrificing aesthetics.
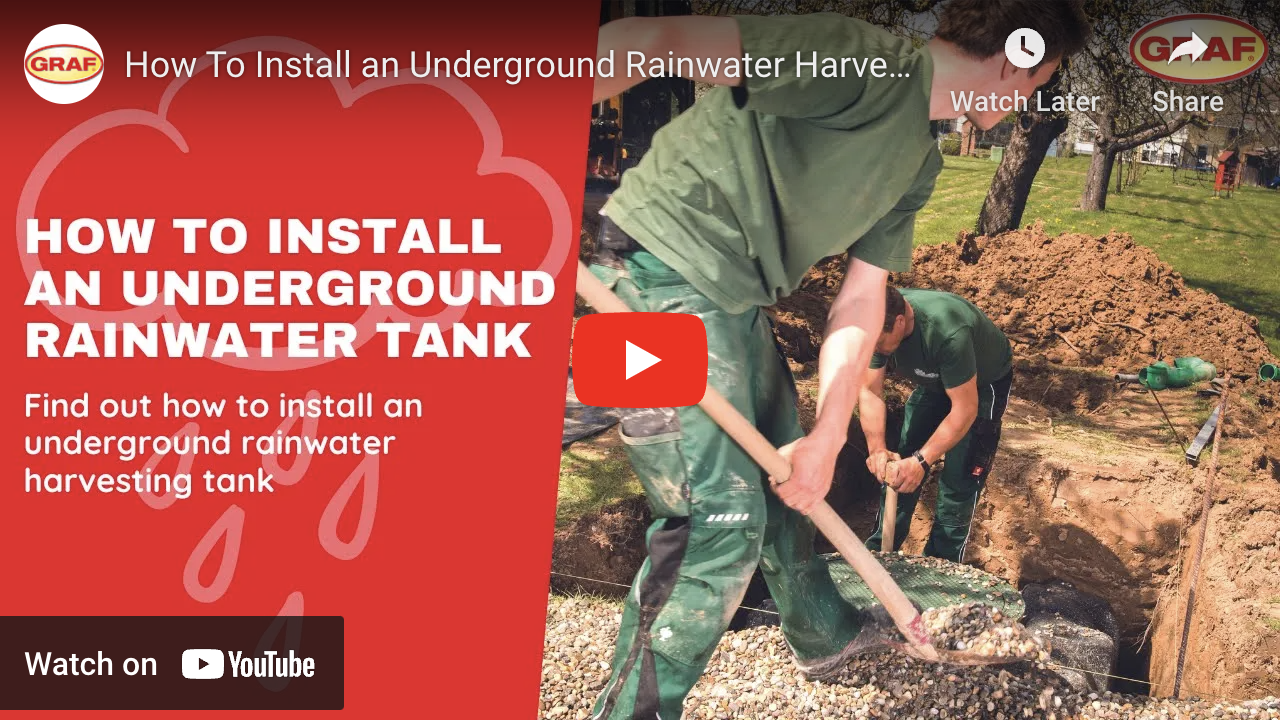
Excavate with Precision: The Foundation of a Successful Installation
Now that you’ve decided on the perfect location for your underground rainwater harvesting tank, let’s dive into the excavation process. Before you pick up a shovel, careful planning is essential, pay close attention to any guidelines related to slopes and groundwater levels in your region. Understanding these factors ensures that your tank is properly placed for efficient water collection.
With the area chosen and potential obstacles like roots or rocks removed, it’s time to dig. The excavation should match the tank’s specifications and dimensions. The depth should allow for the tank to be fully buried while maintaining proper clearance for connections.
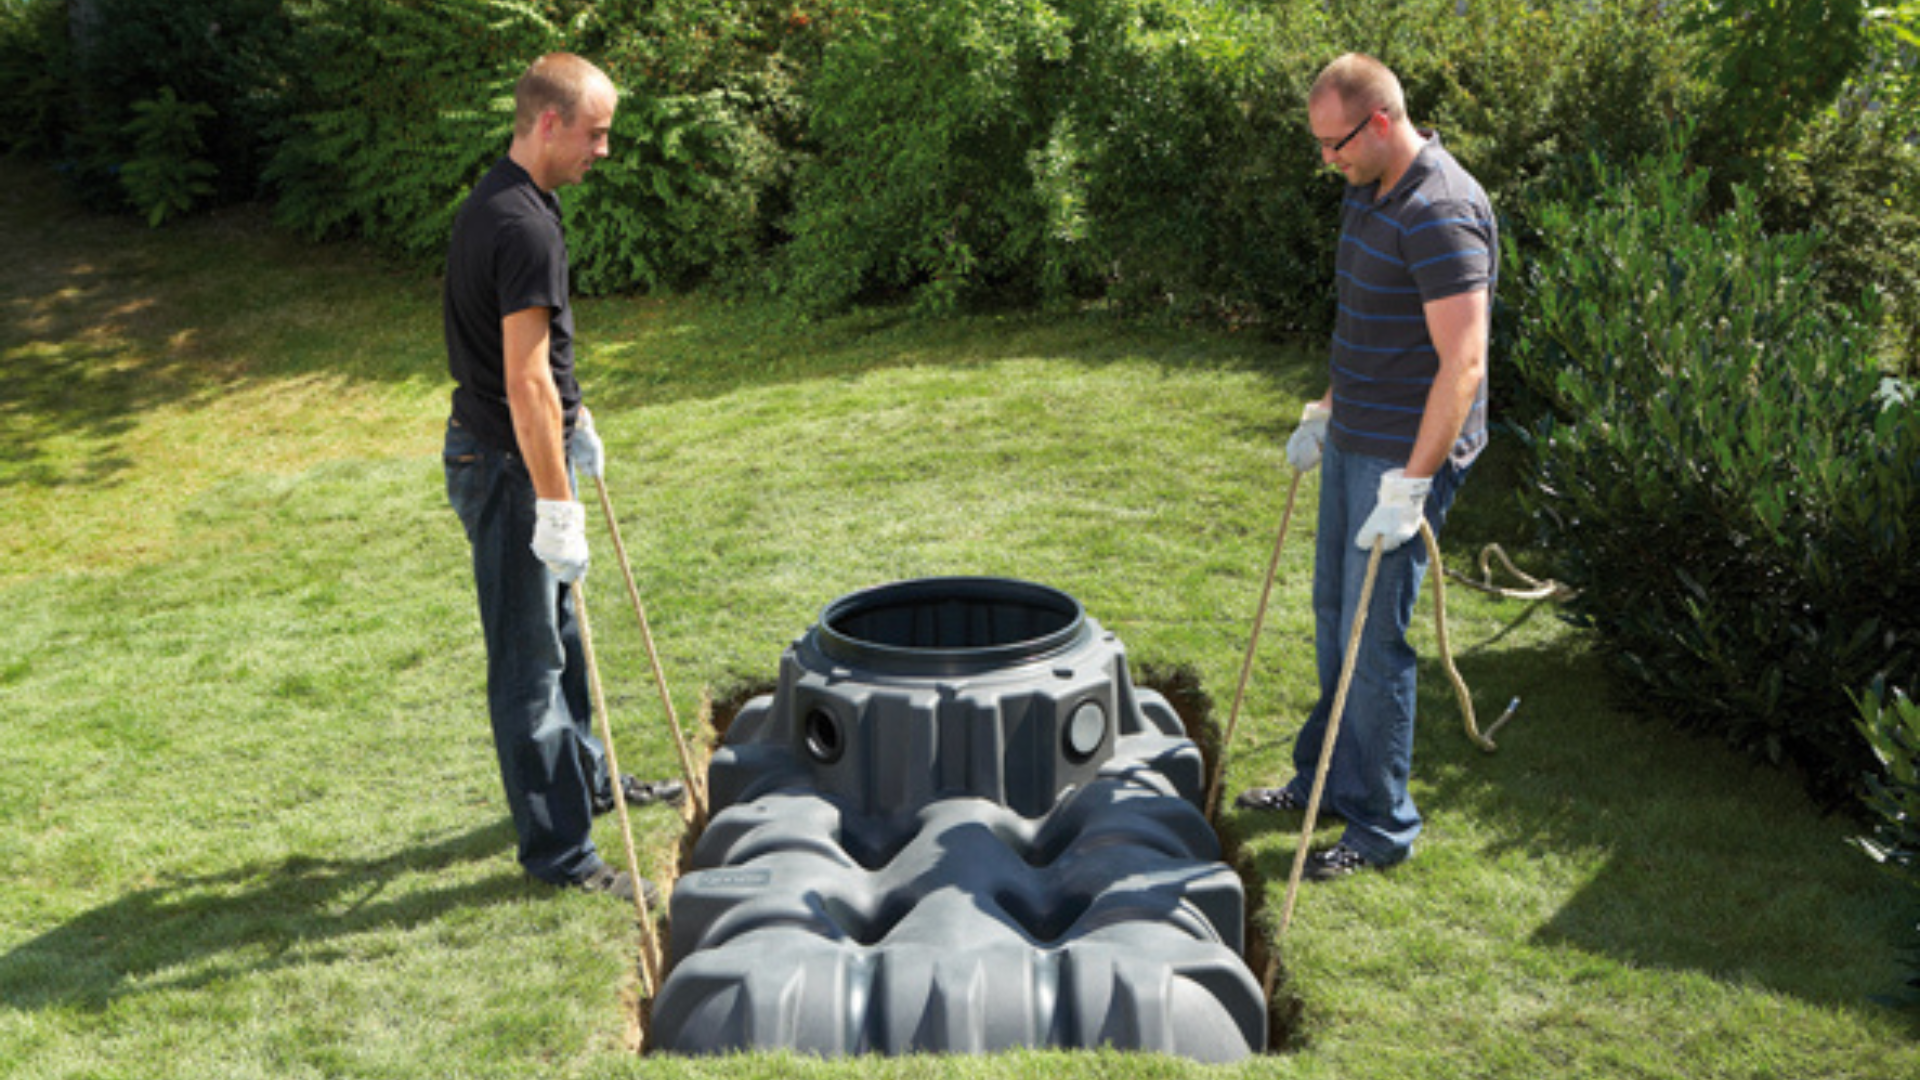
Tank Placement
With the excavation completed, it’s time to place your underground tank in the trench. The beauty of Graf systems lies not only in their efficiency but also in their user-friendly design. These tanks are surprisingly lightweight, eliminating the need for heavy machinery during installation, and can be easily handled by a small team or even a few capable individuals.
Begin by gently lowering the tank into the trench excavated, paying close attention to its alignment. Ensure it sits horizontally and securely within the excavation. Proper alignment ensures efficient water collection and prevents any future complications. Double-check that the inlet and outlet connections are in the right positions.
Attaching the Turret
Now that your Graf UK rainwater harvesting tank is securely in place, it’s time to move on to attaching the tank turret. Locate the designated opening or access point on the top of your Graf tank. This is where the tank turret will be attached. Carefully attach the tank turret to the opening, ensuring a snug and watertight fit.
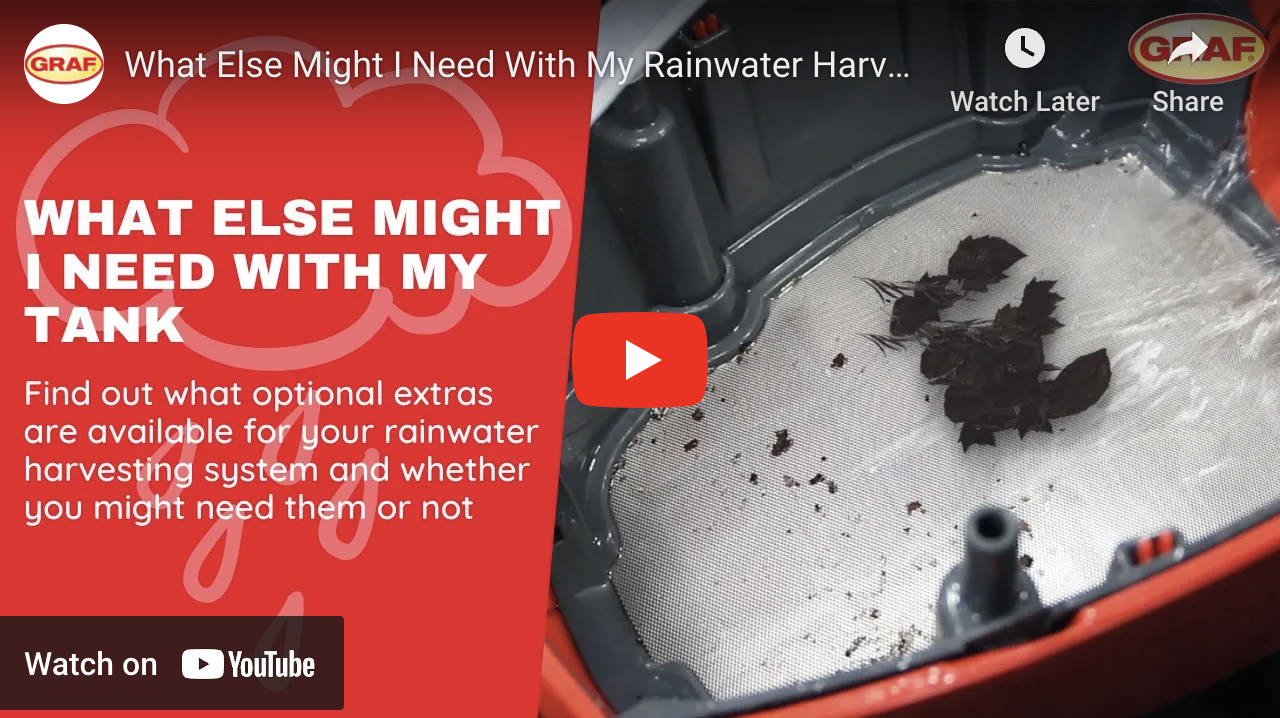
The Filter Package and Downpipes
The next critical phase in your Graf UK rainwater harvesting system installation involves setting up the filter package and connecting the roof downpipes. These steps are integral to ensuring the efficient collection of rainwater while maintaining system integrity.
Begin by installing the filter package. This component plays a pivotal role in filtering out debris and contaminants from the rainwater before it enters your tank.
Now, it’s time to connect your roof downpipes to the rainwater harvesting system. These downpipes are responsible for channelling rainwater from your roof’s surface to the filter package and, ultimately, into the tank. Use appropriate fittings and connectors to establish a secure connection.
As you progress with the installation, remember to incorporate the overflow u-bend into your system. This component is crucial for managing excess rainwater and preventing overflows. Ensure that the u-bend maintains a minimum decline of at least 1% in the same direction as the flow to facilitate efficient water management.
Backfilling
With your Graf UK rainwater harvesting system components in place and seamlessly connected, the next step is backfilling. This is where you’ll gently fill the excavated space around your underground tank to secure it and create a stable foundation. Proper backfilling ensures that your system remains reliable and efficient for years to come. One notable advantage of choosing a Graf system is that it doesn’t require concrete for backfilling, making the installation process more eco-friendly and straightforward.
- Select gravel or a similar backfill material that provides adequate drainage and support. The use of appropriate materials is crucial for maintaining the integrity of your underground tank and preventing soil erosion.
- Begin the backfilling process by adding the chosen material in layers of approximately 30cm at a time. This layering technique helps distribute the weight evenly and minimizes the risk of settling or uneven ground.
- As you add each layer of backfill material, make sure to simultaneously raise the water level inside the tank. This counteracts the pressure from the backfill material and helps maintain the tank’s stability.
- After each layer of backfill, use a suitable compaction method to ensure that the material settles evenly around the tank. Adequate compaction prevents voids and ensures a solid foundation.
Dome Shaft
Before the backfilling process is complete, it’s time to introduce the dome shaft. This step should be carried out while the hole is still partially filled. One of the distinct benefits of choosing Graf is that you can place the dome shaft so that it sits flush with the ground, ensuring a seamless and visually pleasing integration with your landscape. The dome shaft serves as the access point for maintenance and monitoring of your rainwater harvesting system. Its user-friendly design makes it easy to open and close as needed, ensuring that your system remains efficient and trouble-free
Connecting your Tank
With your Graf UK rainwater harvesting system installed, it’s time to make the crucial connection that brings the harvested rainwater into your home. This is where the convenience and efficiency of your system truly shine. You’ll connect the underground tank to your house using a pipe, with the entire operation managed by the control panel inside your property.
Connect one end of the selected pipe to the outlet or distribution point of your underground tank. Ensure a secure and watertight connection to prevent any leaks or disruptions in the rainwater transfer process.
Carefully route the other end of the pipe from the underground tank to your home, following the designated path or conduit established during the planning phase. Ensure that the pipe is properly supported and protected along its route to prevent damage.
The Pump Package
As you embark on the final stages of your Graf UK rainwater harvesting system installation, you’ll focus on setting up the pump package—a pivotal component that allows you to efficiently manage and monitor the entire system. The type of pump package you require dictates how you set it up. If you have a system that has a submersible pump inside the underground tank, then you will need to feed a power supply through the ducting from the home to the tank. If you want a system that has an external wall-mounted pump, then you only need to feed a power supply to the unit, which can be housed in a garage, basement, or plant room.
Marking Rainwater Pipes
Lastly, you will need to ensure that all rainwater pipes are appropriately marked to distinguish them from pipes used for drinking water. This simple yet important step helps prevent any confusion and guarantees that harvested rainwater is used for the intended purposes while preserving the quality of your potable water supply. As part of UK water regulations rainwater pipes are distinctly colour-coded in black and green to avoid the possibility of rainwater being used where potable tap water is needed.
In this comprehensive installation guide, we’ve unveiled the simplicity and effectiveness of Graf UK’s rainwater harvesting systems, designed with both your convenience and environmental responsibility in mind. With the potential to reduce your home’s demand for precious drinking water by up to 50%, Graf systems are a sustainable choice that benefits both you and the planet.
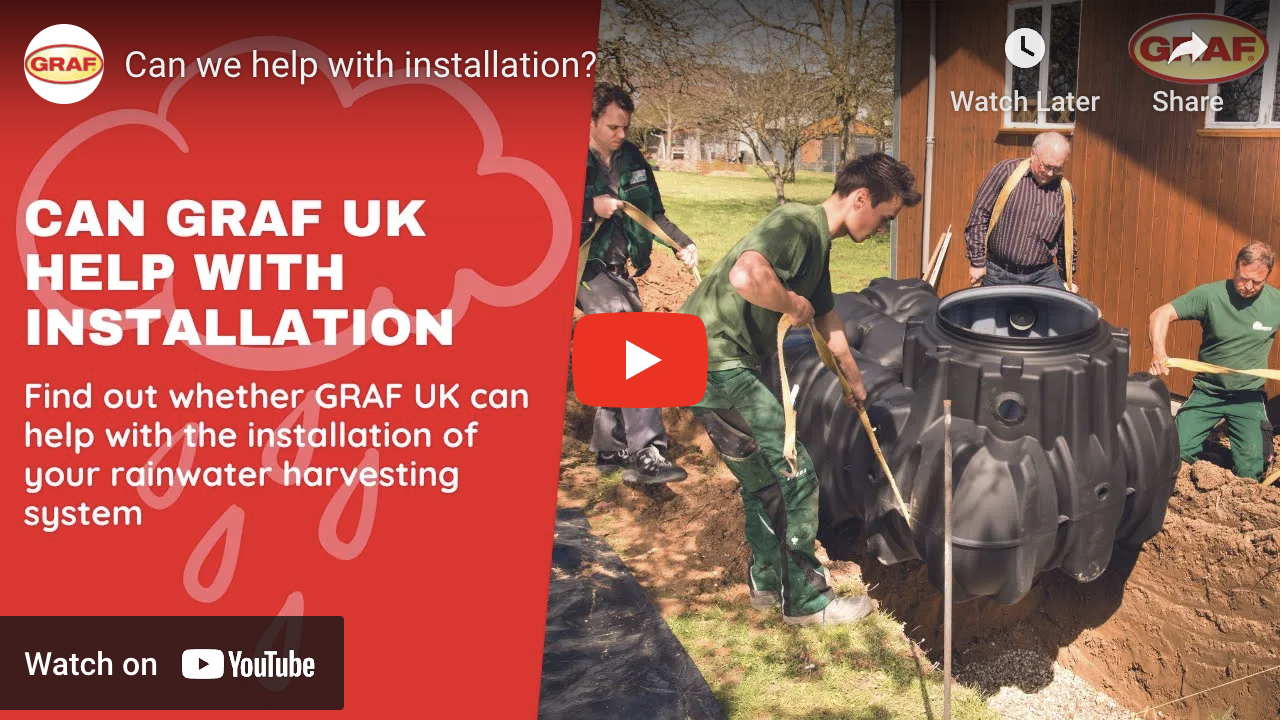
If you require any assistance on the installation of your rainwater harvesting system don’t hesitate to contact us, our team of friendly experts are always happy to help.